
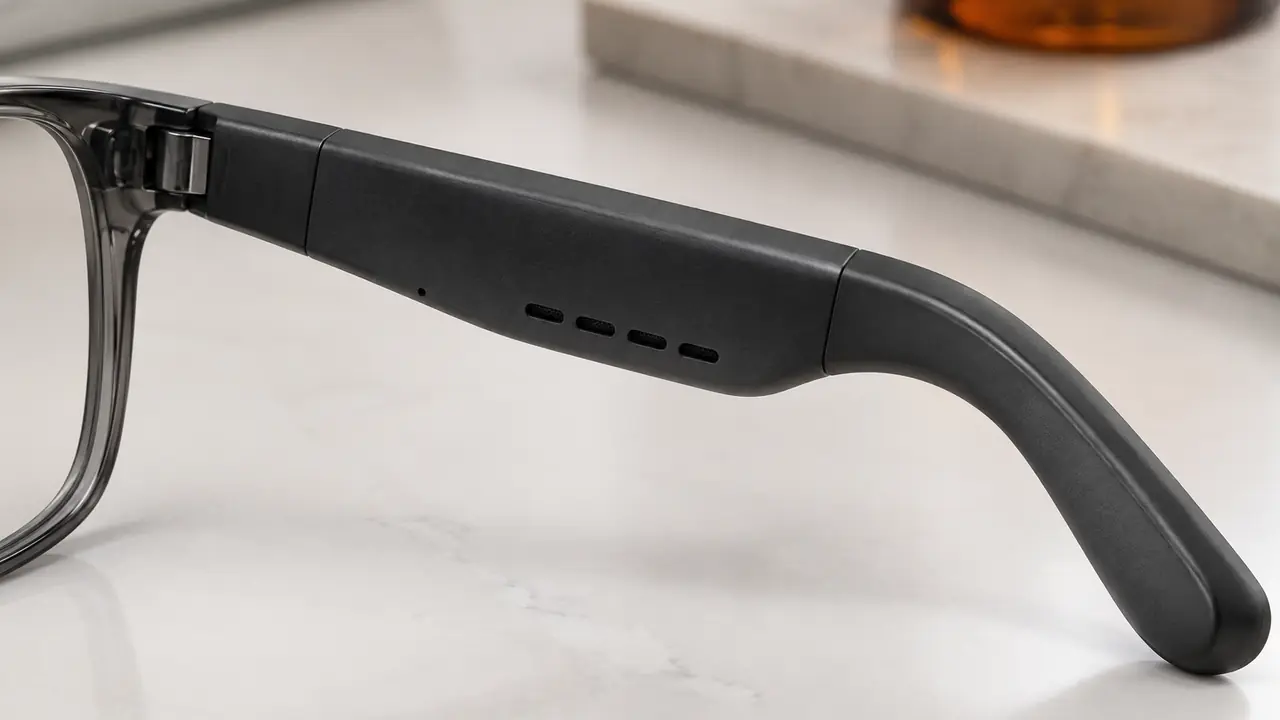
Why open-ear glasses leak at all
An open-ear temple speaker does not seal the ear, so it works like a very small loudspeaker placed a few centimetres from the ear canal. Sound spreads out from the port in every direction; the wearer hears the part that reaches the ear, and people nearby hear the rest. In a quiet office, a train carriage or a meeting room, that remainder is what customers call leakage. It is a property of the format, not a defect, but the amount varies widely between designs and between two units of the same design that were assembled differently.
Leakage matters commercially for two reasons. It shapes reviews - a buyer who hears complaints from colleagues returns the pair even if they like the sound - and it limits the use cases a listing can honestly describe. A pair that leaks noticeably at mid volume is still fine for outdoor walking, but it should not be positioned for open-plan offices or libraries.
The main causes
Leak almost always traces back to one or more of five causes. The first is port layout: a single forward port with a sealed back radiates widely, while a layout with a rear port can cancel part of the far-field sound because the rear output is opposite in phase to the front. The second is port distance to the ear: the farther the main port sits from the ear, the more volume the wearer needs, and every extra step raises leak for everyone else. The third is tuning: equaliser boosts in the upper midrange make speech and cymbals carry further. The fourth is volume headroom: if the maximum volume step per firmware is set high, customers use it. The fifth is assembly variation: a misaligned mesh, a blocked rear port or a poor driver gasket changes the balance between front and rear output and undoes the cancellation the design relied on.
A diagnosis table
When samples or early batch units leak more than expected, the symptom usually points at the cause. The table is the order the desk works through with a partner plant.
| Symptom | Likely cause | Check | Typical fix |
|---|---|---|---|
| Whole range leaks more than the golden sample | Rear port blocked or mesh changed | Inspect ports and mesh part number | Restore mesh spec, add port inspection to line checks |
| Some units leak more than others | Driver gasket or alignment variation | Leak check on a sample of the lot | Assembly fixture and gasket control |
| Speech carries across the room | Upper-midrange boost in the equaliser | Compare tuning file versions | Revise equaliser per firmware |
| Leak only at top volume steps | Volume ceiling set too high | Measure output at each step | Lower maximum step per firmware |
| Small heads report leak, large heads do not | Port too far from the ear on small fits | Fit check on size fixtures | Second front size or shorter temple option |
| Leak acceptable but sound thin | Cancellation too aggressive near the ear | Response check at ear position | Rebalance port sizes, retune low end |
Fixes by program stage
Which fixes are available depends on how far the program has gone. On a catalog model the temple tooling, ports and driver are fixed, so the levers are firmware tuning and the volume ceiling, plus choosing the frame size that puts the port closest to the ear for your customers. On a logo program the same applies, and a plant can often load a revised tuning file before shipment if it is agreed on the golden sample. On a full custom program the port layout, chamber and mesh can all be designed for leak from the start, at the cost of new temple tooling and acoustic iteration.
- Define the use case. Office and transit ranges need tighter leak targets than outdoor ranges.
- Agree the method. Fixture, distance, signal and volume step for leak checks, written on the spec sheet.
- Compare toolings. Shortlist temple toolings with rear-port layouts where leak matters.
- Tune and cap. Equaliser and maximum volume step per firmware, frozen on the golden sample.
- Hold the line. Port, mesh and leak checks on batch samples during inspection.
The acoustic choices available on each tooling are summarised on acoustic design, and the test methods on testing and inspection.
What not to promise in listings
Leak is relative. A listing can describe the design - for example a rear-port layout for reduced sound leakage per acoustic test - and suggest suitable settings such as commuting and outdoor use. It should not promise that nobody nearby will hear anything, and it should not describe leak control as private listening in any absolute sense. It is also wise to tell customers that lowering the volume a step or two reduces leak far more than any setting in the app. Clear, modest wording keeps the return rate down and is easier to defend if a marketplace questions a claim.
Questions to ask a partner plant
- Which port layout does this temple tooling use, and is the rear port meshed?
- Which tuning file version is on the sample, and can it be changed per firmware before shipment?
- What is the maximum volume step, and can it be lowered without affecting call volume?
- How is leak checked on the line, and on how many units per lot?
- Has the mesh or driver supplier changed since the golden sample?
Planning a low-leak range
Brands that care about leak usually start with a catalog model that already has a rear-port layout, audition it against one or two alternatives in the same room on the same playlist, and only move to custom tooling once sales data justify it. Typical starting quantities are 50 to 500 pairs per catalog model and 500 to 1,000 pairs for a logo program; custom temple tooling for a new port layout is a full ODM program from about 3,000 pairs, with engineering samples in about 30 to 60 days including tooling. All are reference ranges confirmed in writing per program on MOQ and lead time. To start, describe your use case and leak expectations on the quote form.